Radiator cooling fans (w/ A/C)
System circuit

Location of radiator cooling fan components

On-vehicle inspection
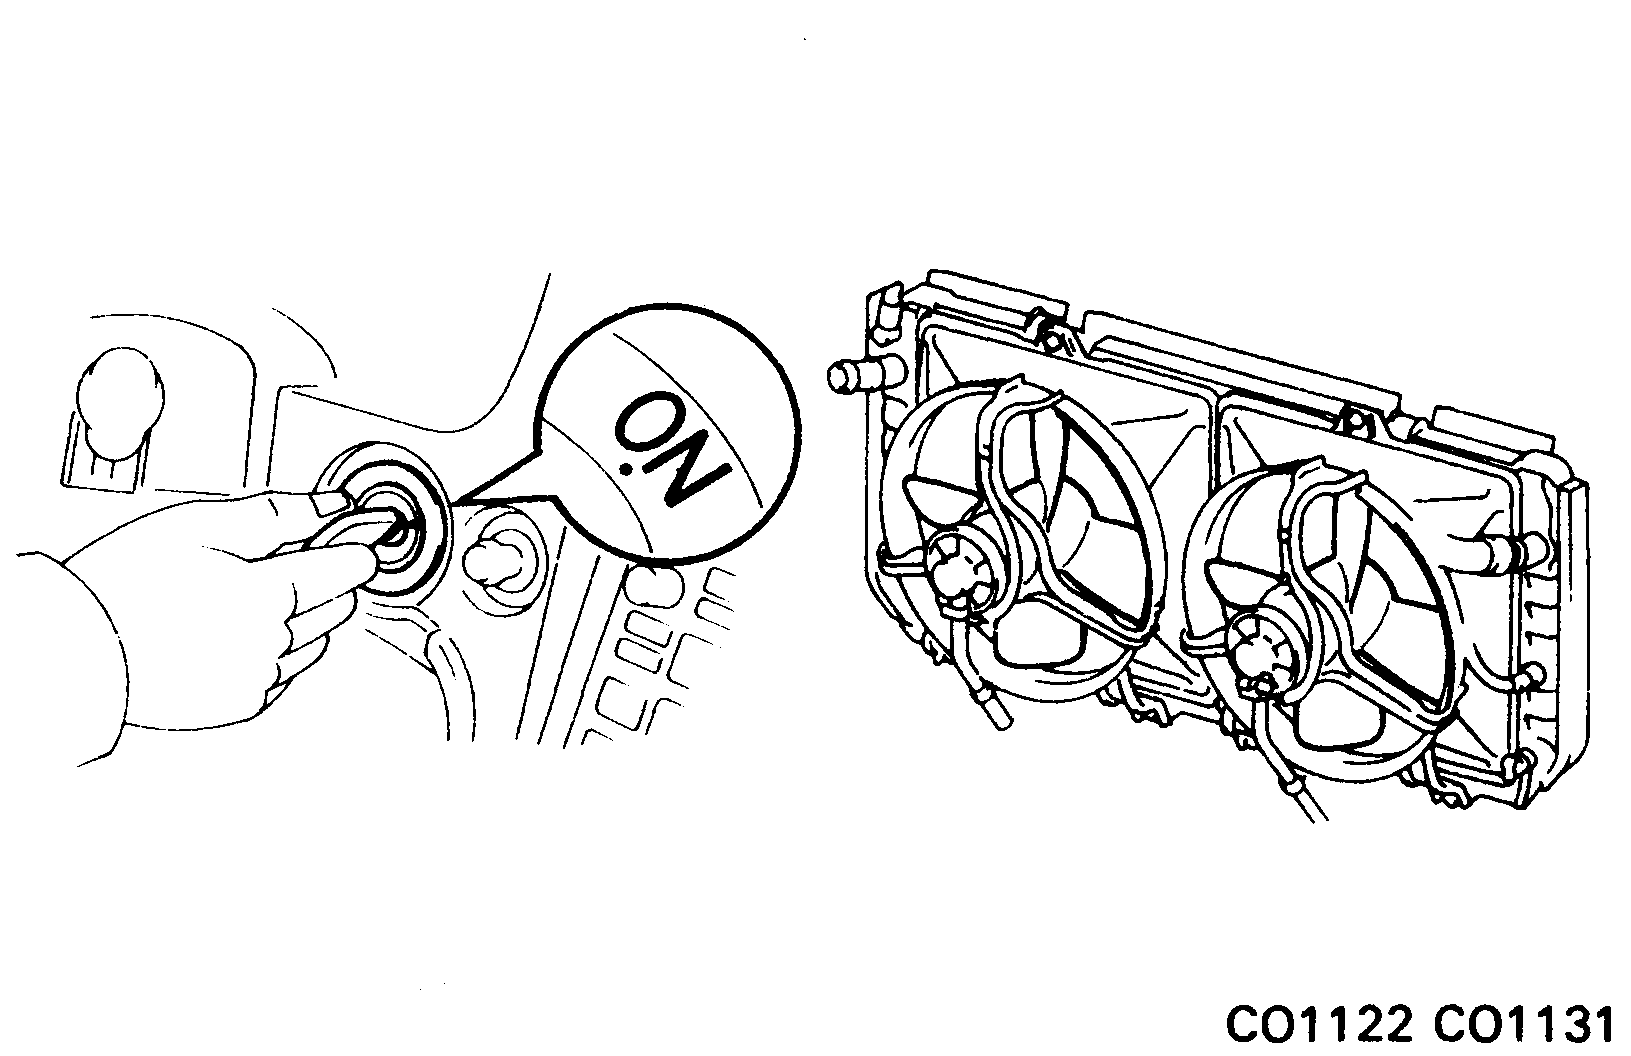
Low temperature (below 85°C (185°F))
-
Turn ignition switch "ON".
Check that the cooling fans stops.
If not, check the cooling fan relays and water temperature sensor, and check for a separated connector or severed wire between the cooling fan relay and water temperature sensor.
-
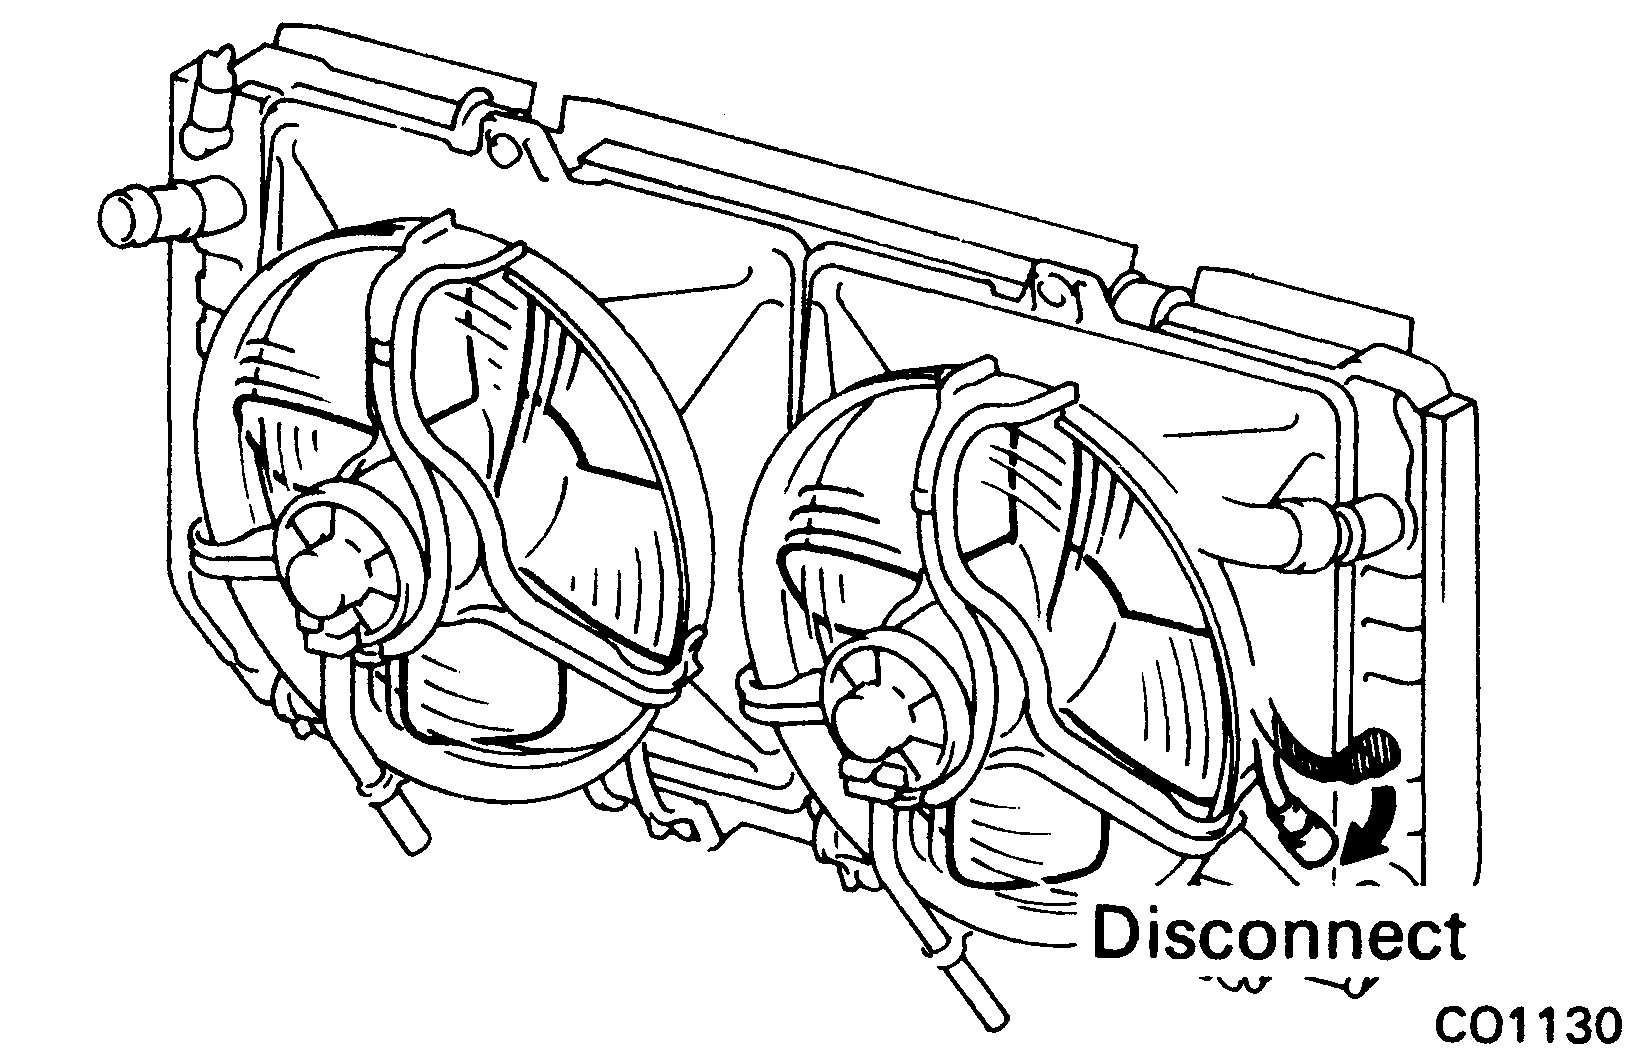
Disconnect radiator water temperature sensor connector.
Check that the cooling fans rotates.
If not, check the fan main relay, cooling fan relays, A/C amplifier, cooling fan and fuses, and check for a short circuit between the cooling fan relay and water temperature sensor.
-
Connect radiator water temperature sensor connector.
High temperature (85 – 90°C (185 – 194°F))
-
Start engine.
- Raise coolant temperature to 85 – 90°C (185 – 194°F).
-
Check that the cooling fans rotates (at low speed).
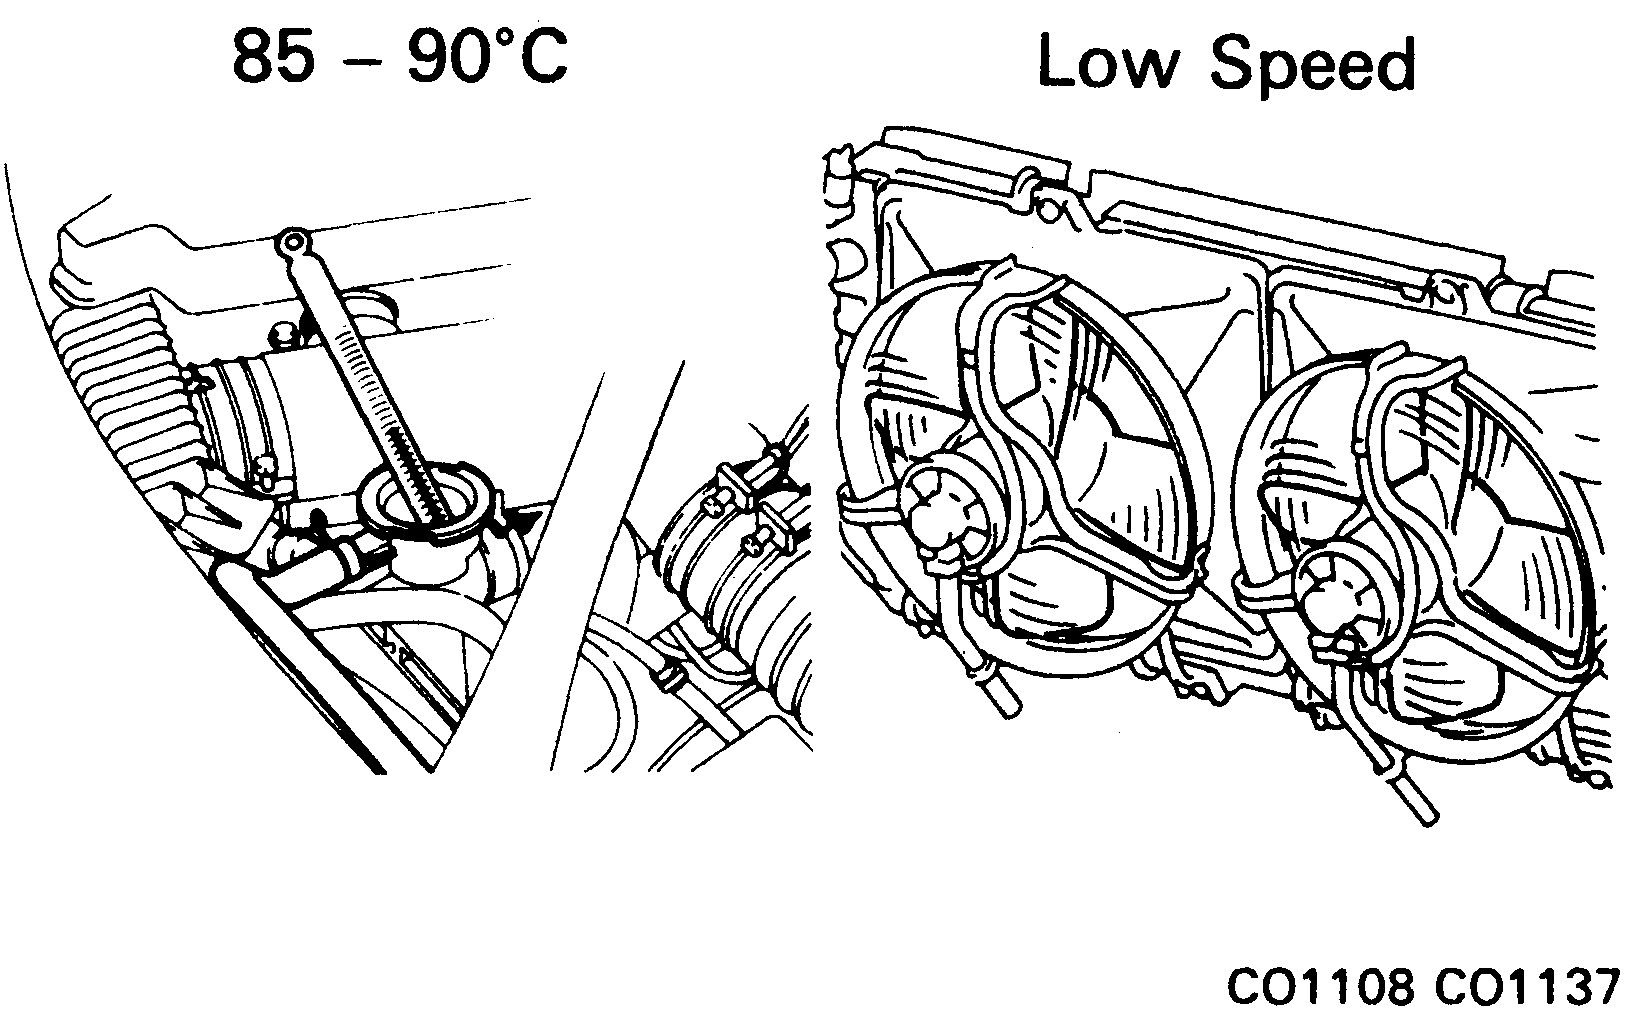
If not, replace the water temperature sensor.
High temperature (above 90°C (194°F))
-
Start engine.
- Raise coolant temperature to above 90°C (194°F).
-
Check that the cooling fans rotates (at high speed).
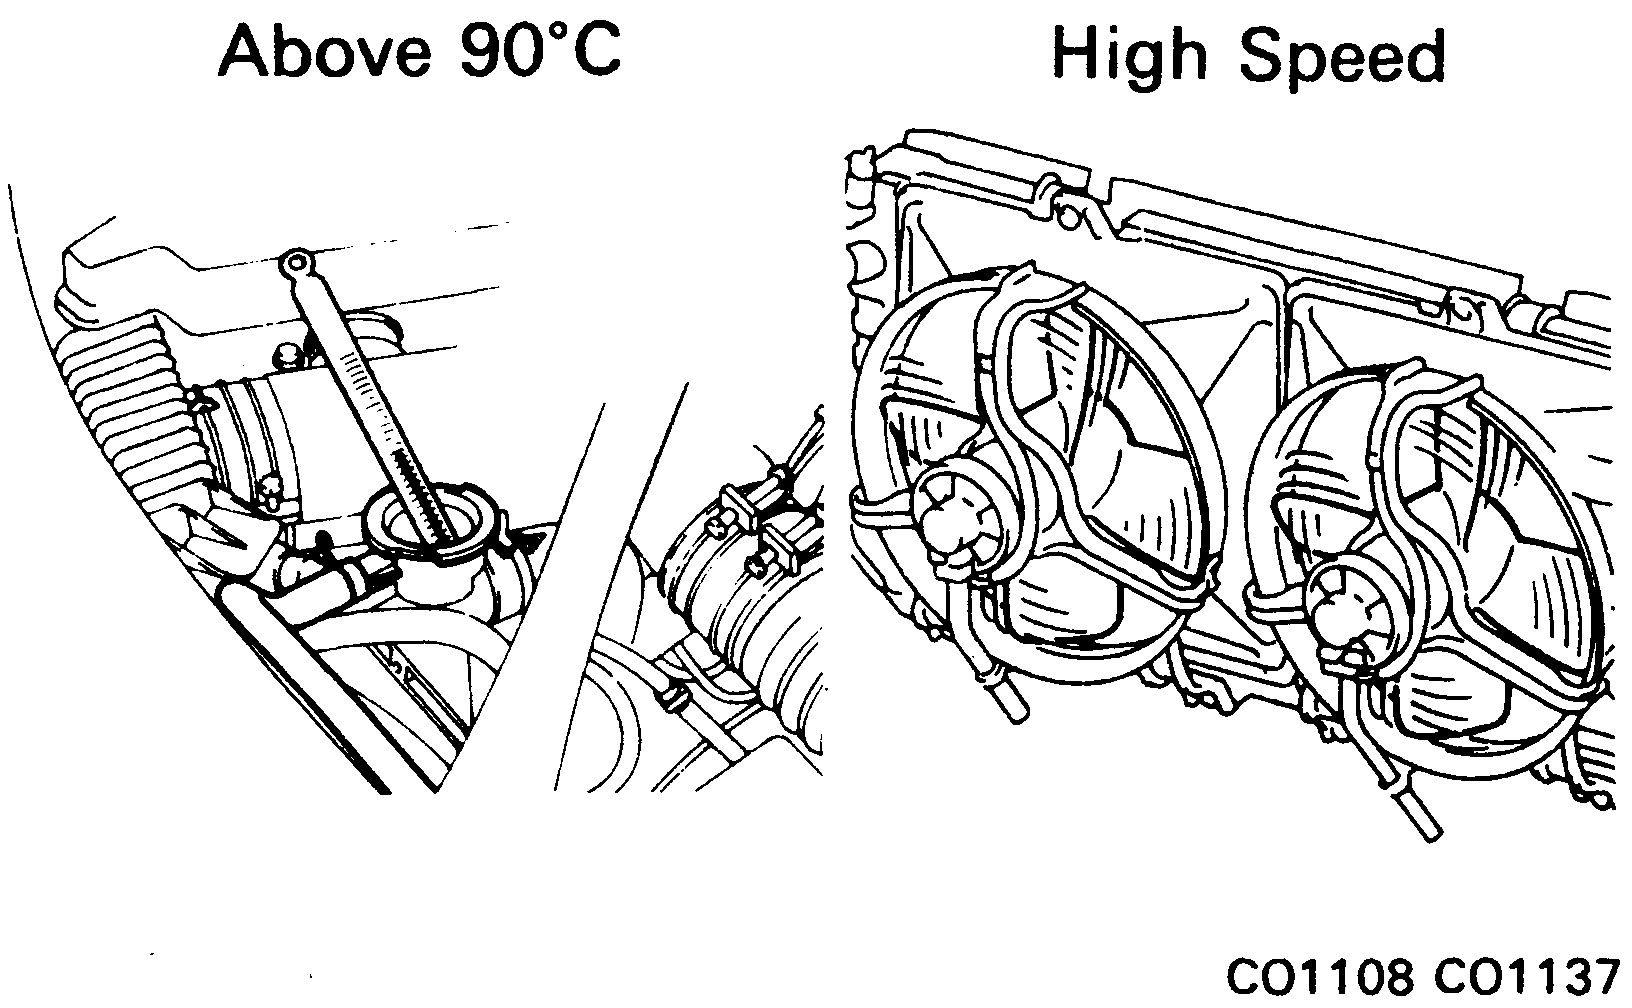
If not, replace the water temperature sensor.
Inspection of radiator cooling fan components
-
Inspect A/C amplifier for circuit.
Disconnect the A/C amplifier connector, and check the connector on the wiring harness side as shown in the chart on the next page.
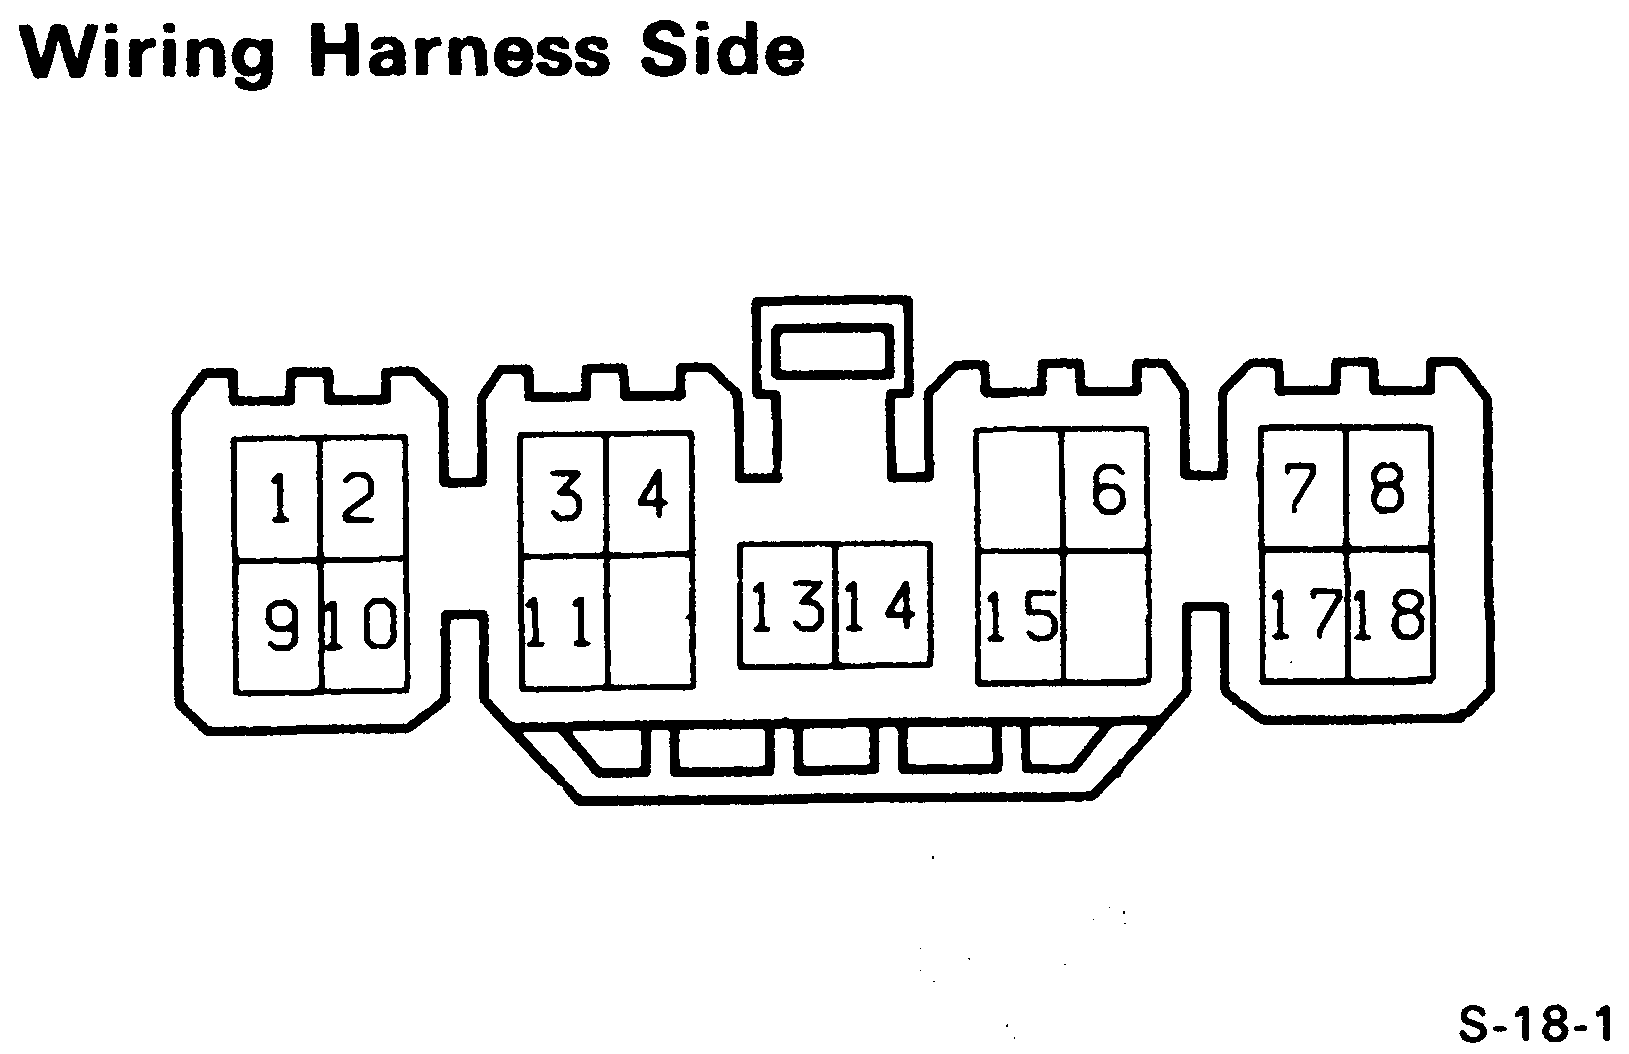
Check for Tester connection Condition Specified value Continuity 3 – Ground – Continuity Voltage 4 – Ground Ignition switch ON Battery voltage Resistance 9 – 15 Coolant temp. 85°C (185°F) Approx. 1.35 kΩ Coolant temp. 90°C (194°F) Approx. 1.19 kΩ Coolant temp. 95°C (203°F) Approx. 1.05 kΩ Voltage 10 – Ground Ignition switch ON Battery voltage Continuity 13 – Ground – Continuity -
Inspect fan main relay ("FAN MAIN"). (See Ignition main relay "IGN")
Check the relay in the same way as the Ignition Main Relay.
-
Inspect No.1 cooling fan relay ("FAN NO.1").
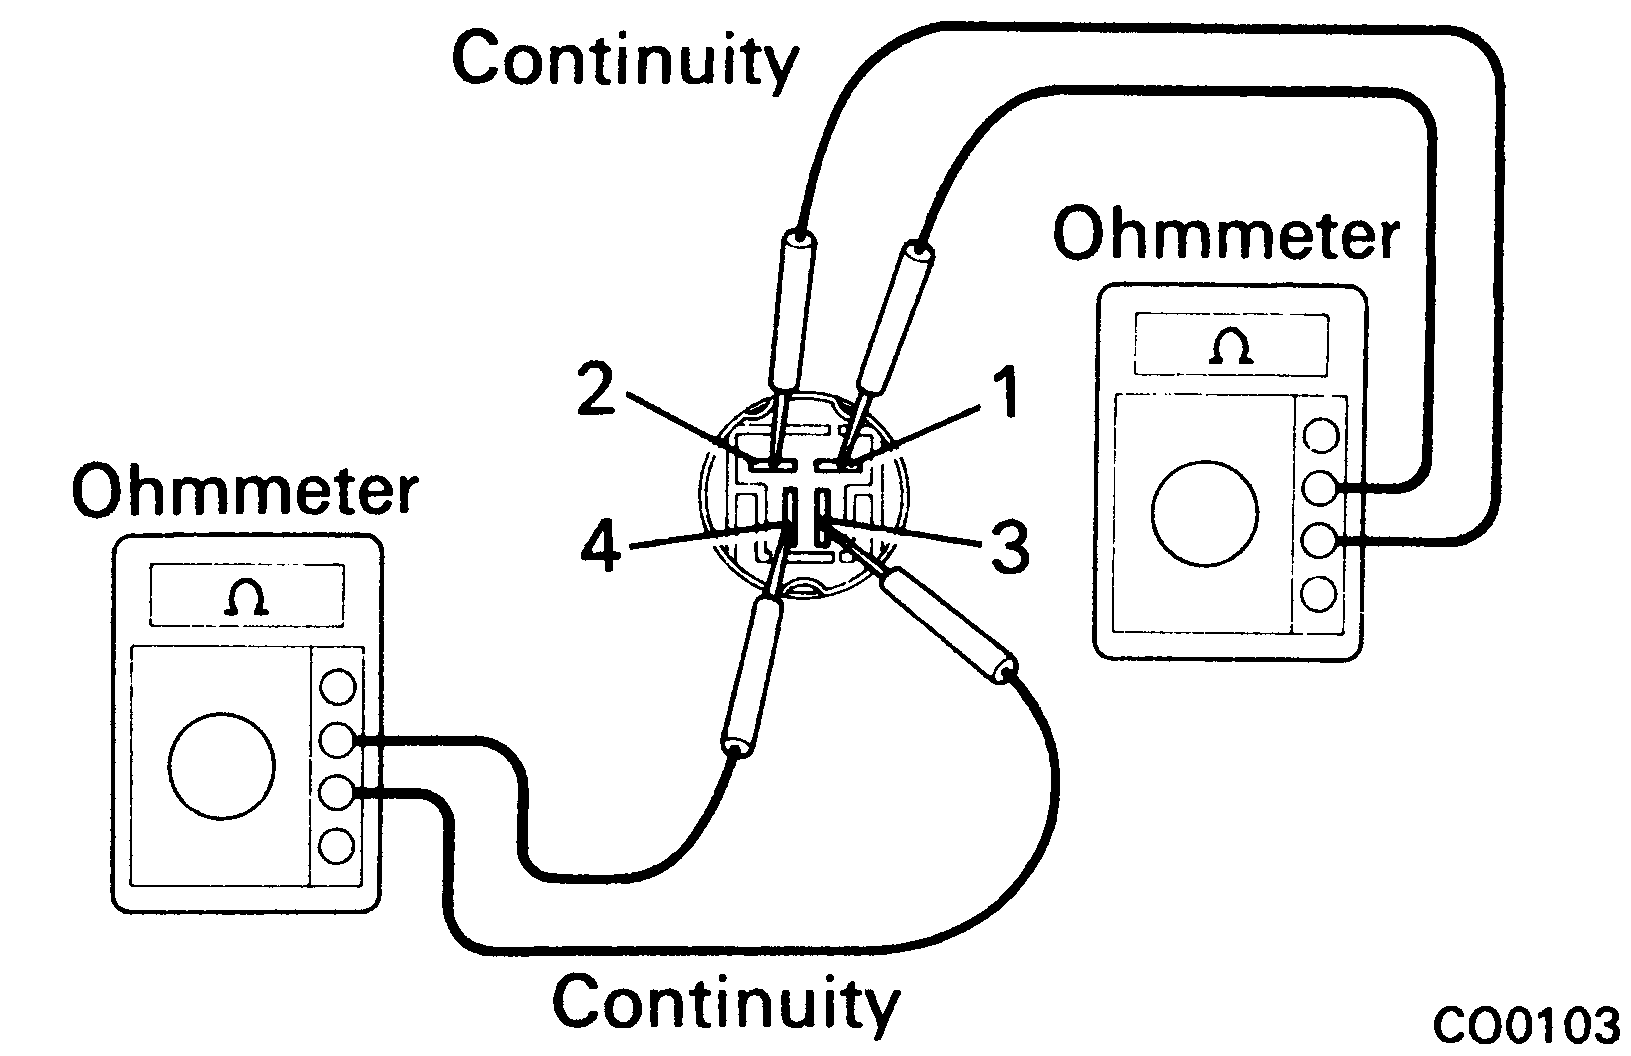
A. Inspect relay continuity
- Using an ohmmeter, check that there is continuity between terminals 1 and 2.
- Check that there is continuity between terminals 3 and 4.
If continuity is not as specified, replace the relay.
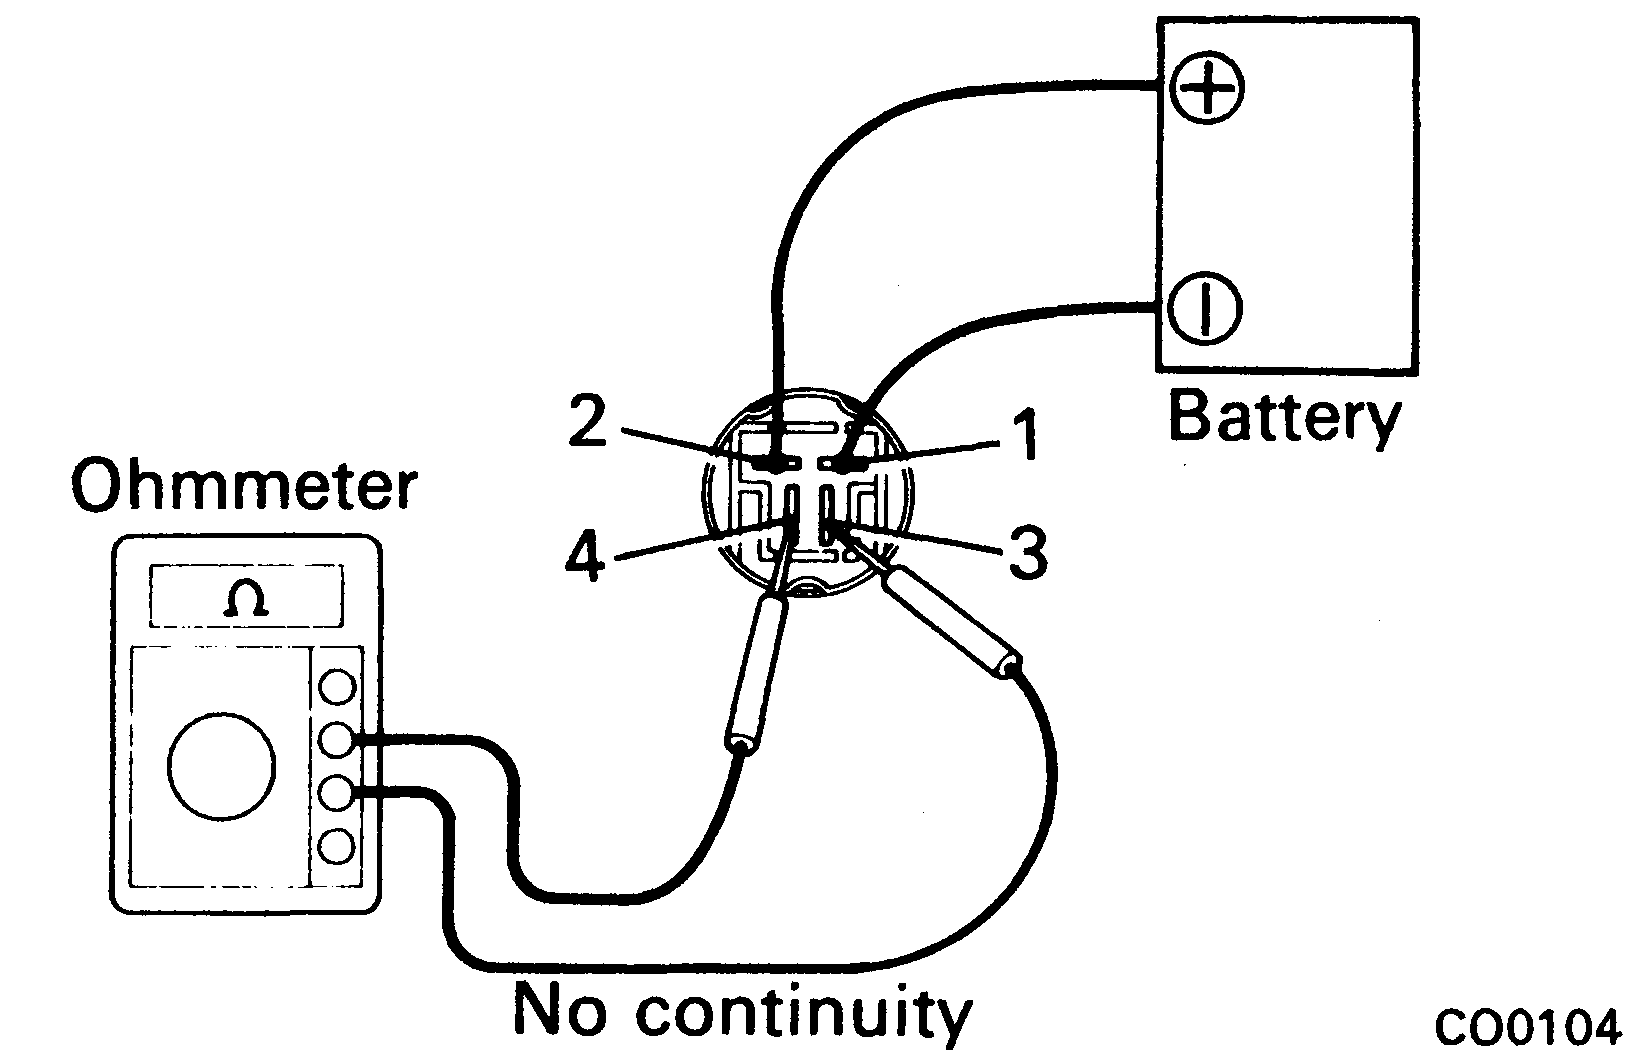
B. Inspect relay operation
- Apply battery voltage across terminal 1 and 2.
- Using an ohmmeter, check that there is no continuity between terminals 3 and 4.
If operation is not as specified, replace the relay.
-
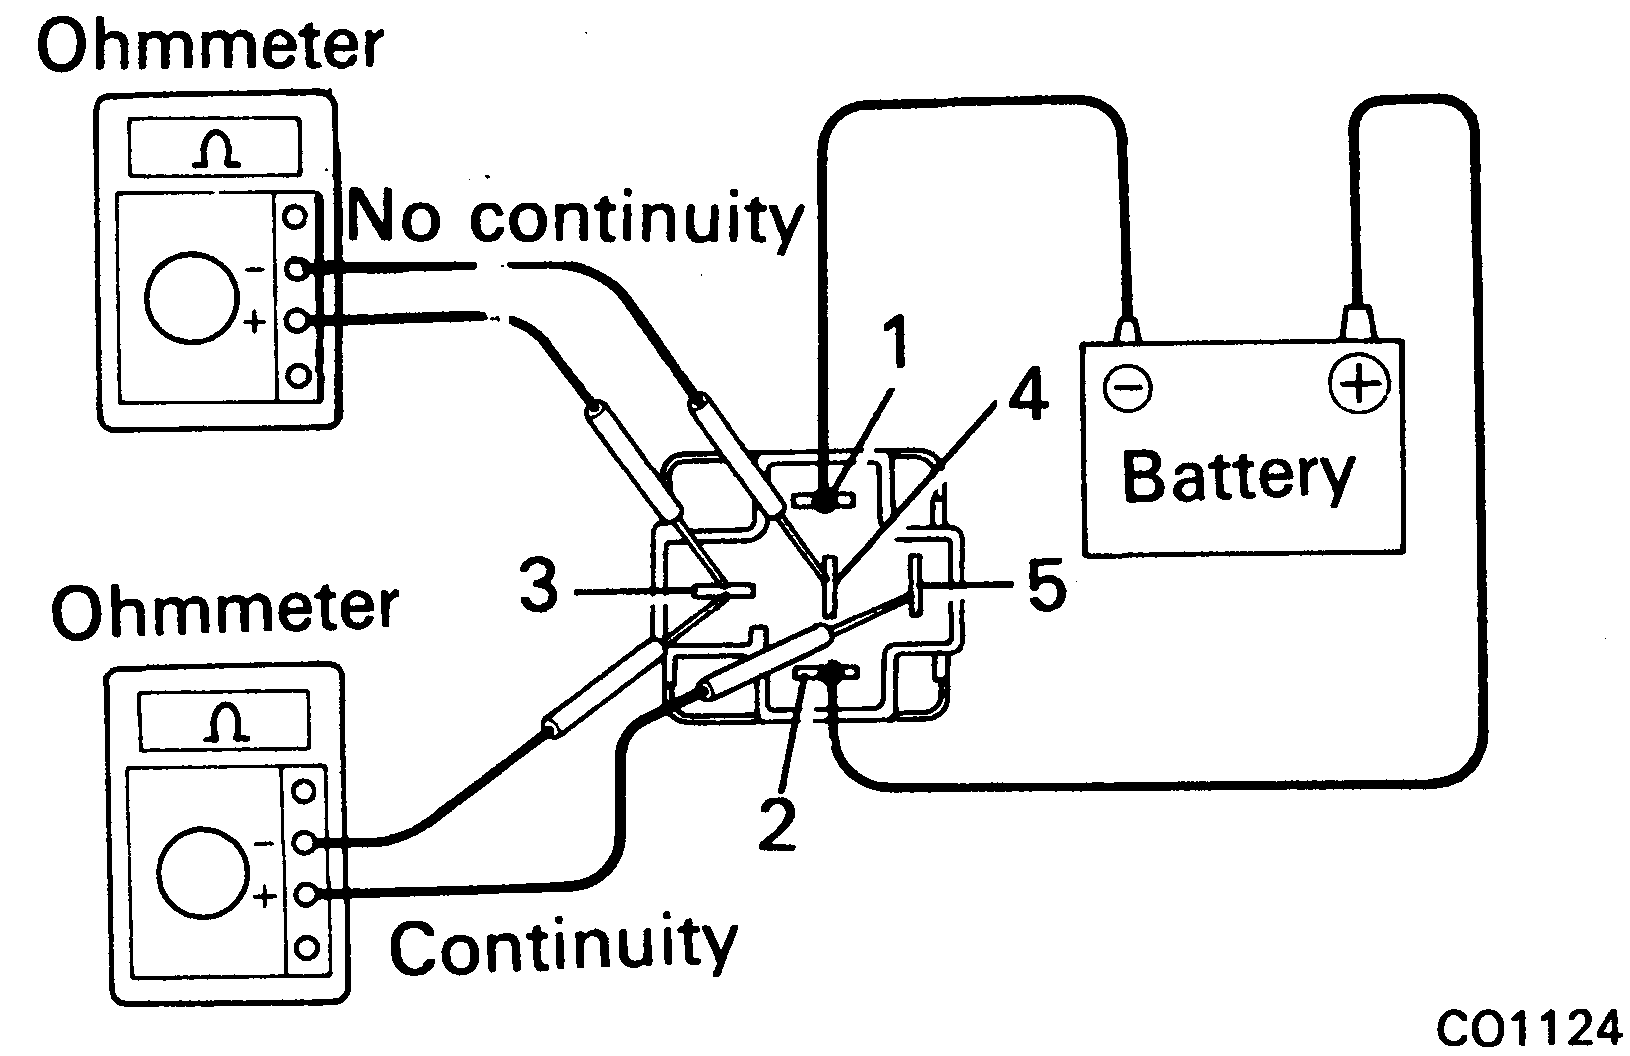
Inspect No.2 cooling fan relay ("FAN NO.2").
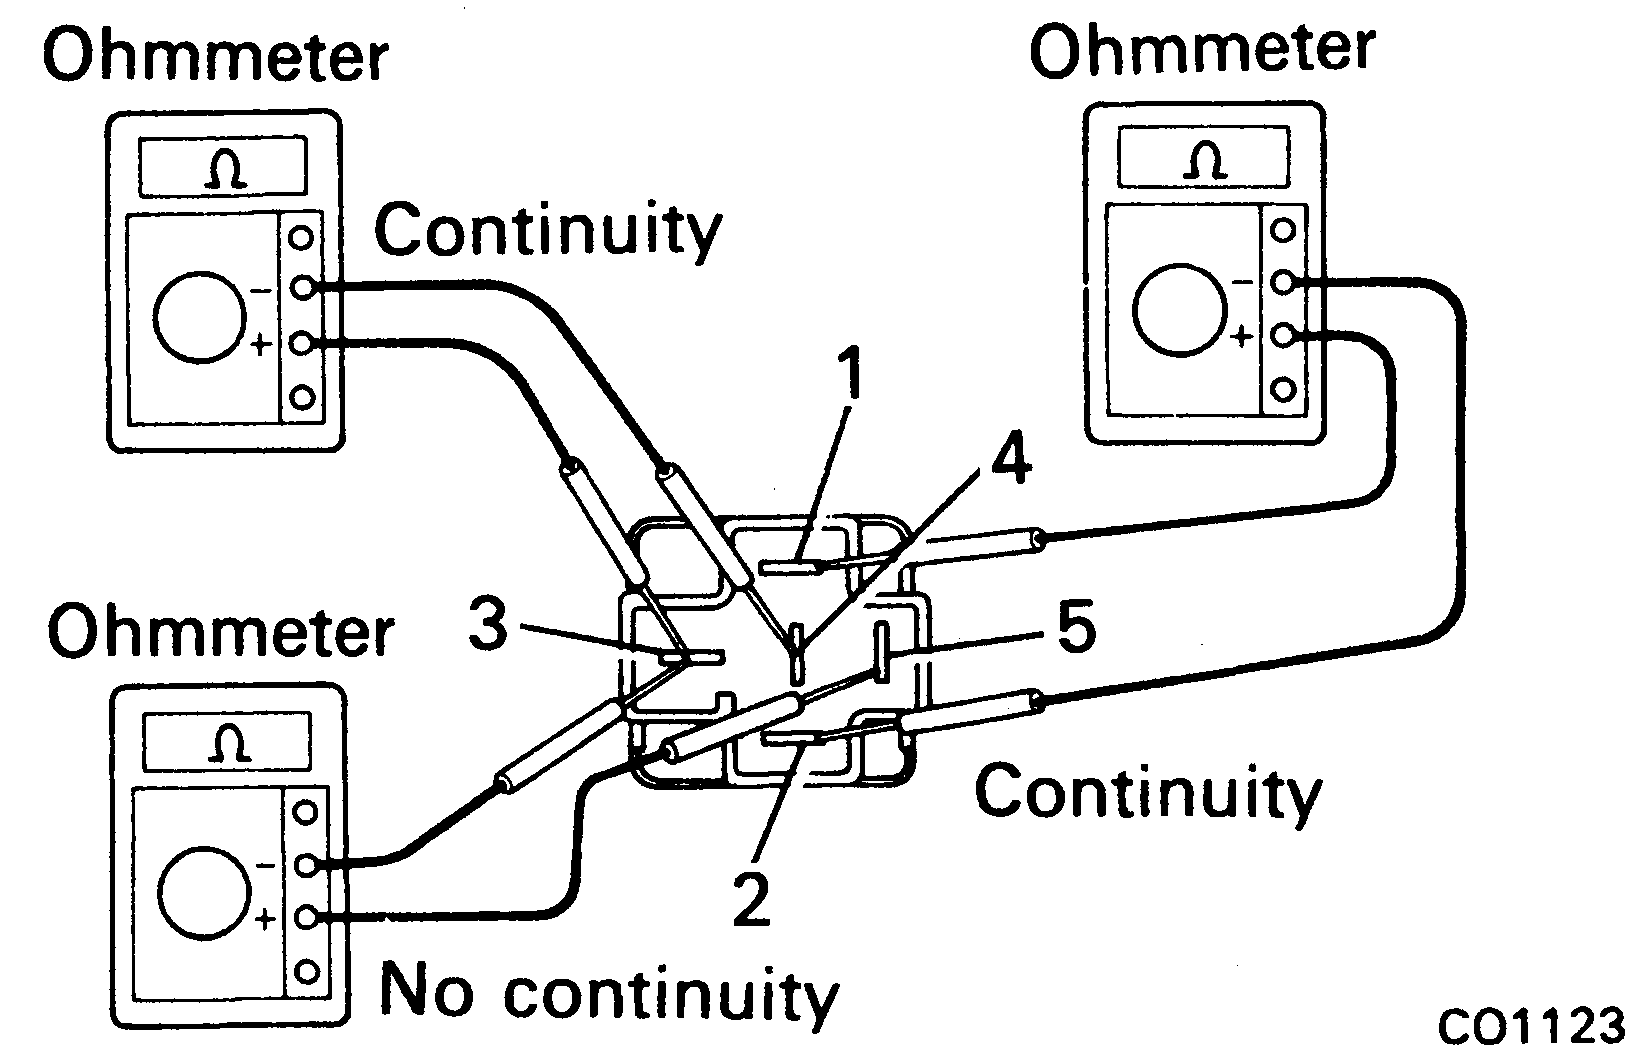
A. Inspect relay continuity
- Using an ohmmeter, check that there is continuity between terminals 1 and 2.
- Check that there is continuity between terminals 3 and 4.
- Check that there is no continuity between terminals 3 and 5.
If continuity is not as specified, replace the relay.
- Apply battery voltage across terminal 1 and 2.
- Using an ohmmeter, check that there is no continuity between terminals 3 and 4.
- Check that there is continuity between terminals 3 and 5.
If operation is not as specified, replace the relay.
-
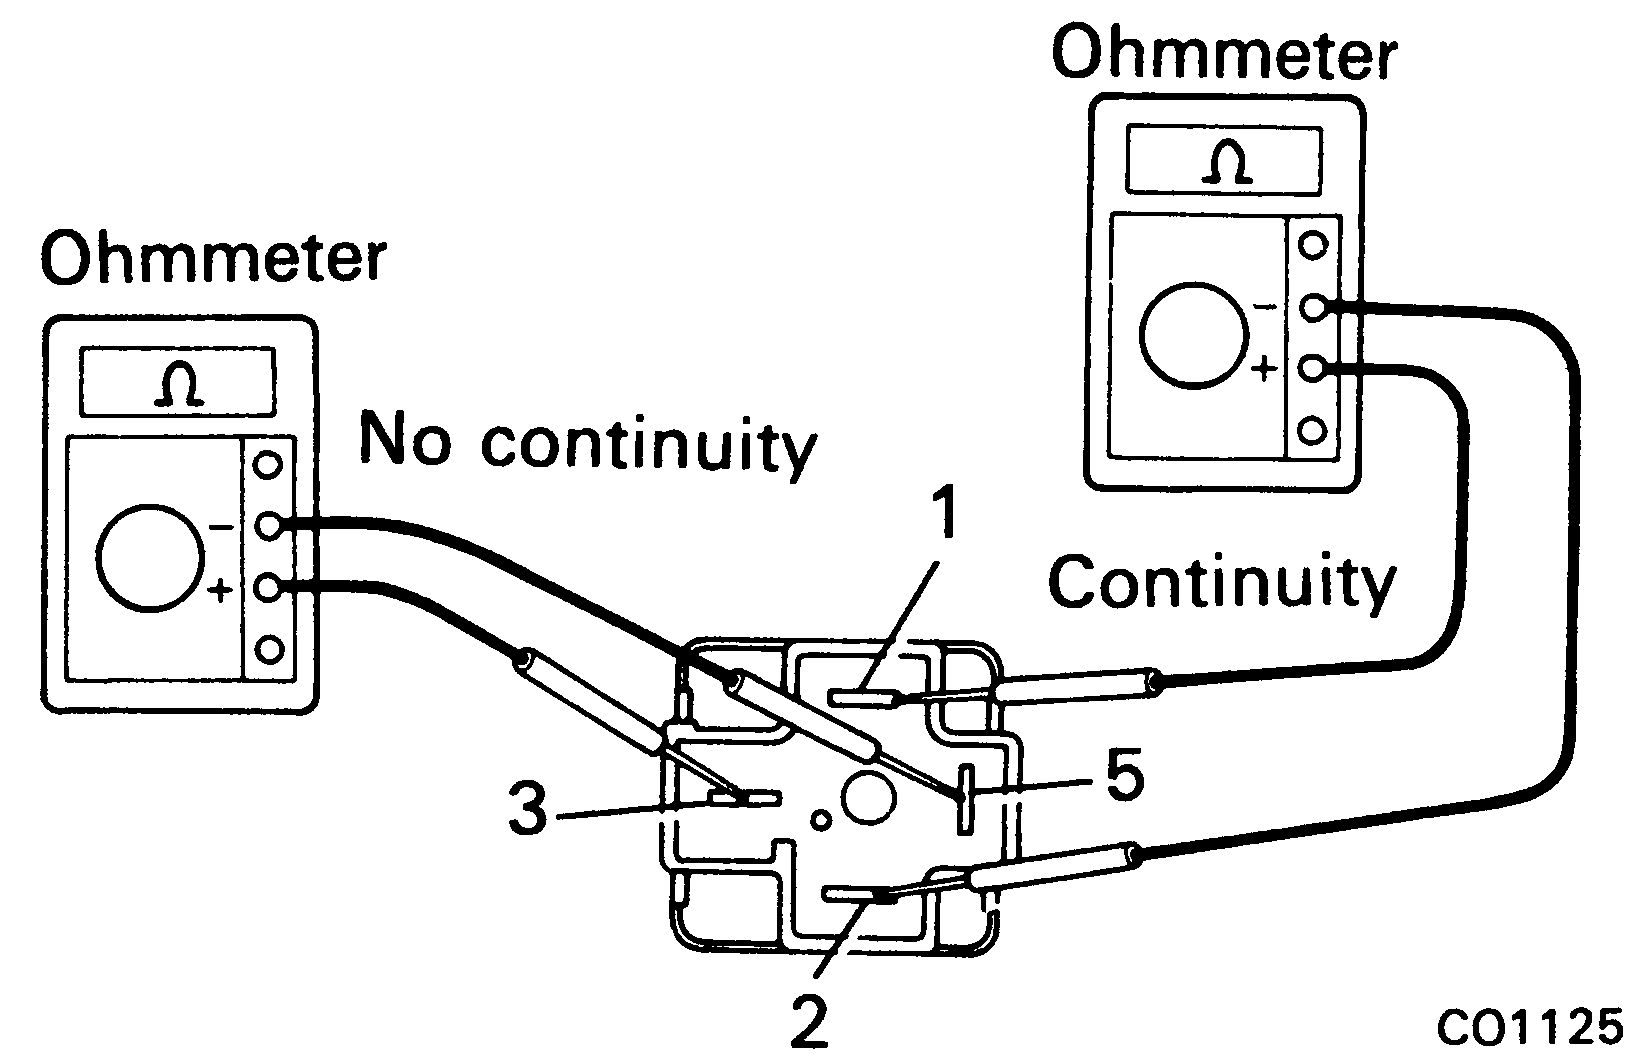
Inspect No.3 cooling fan relay ("FAN NO.3").
A. Inspect relay continuity
- Using an ohmmeter, check that there is continuity between terminals 1 and 2.
- Check that there is no continuity between terminals 3 and 5.
If continuity is not as specified, replace the relay.
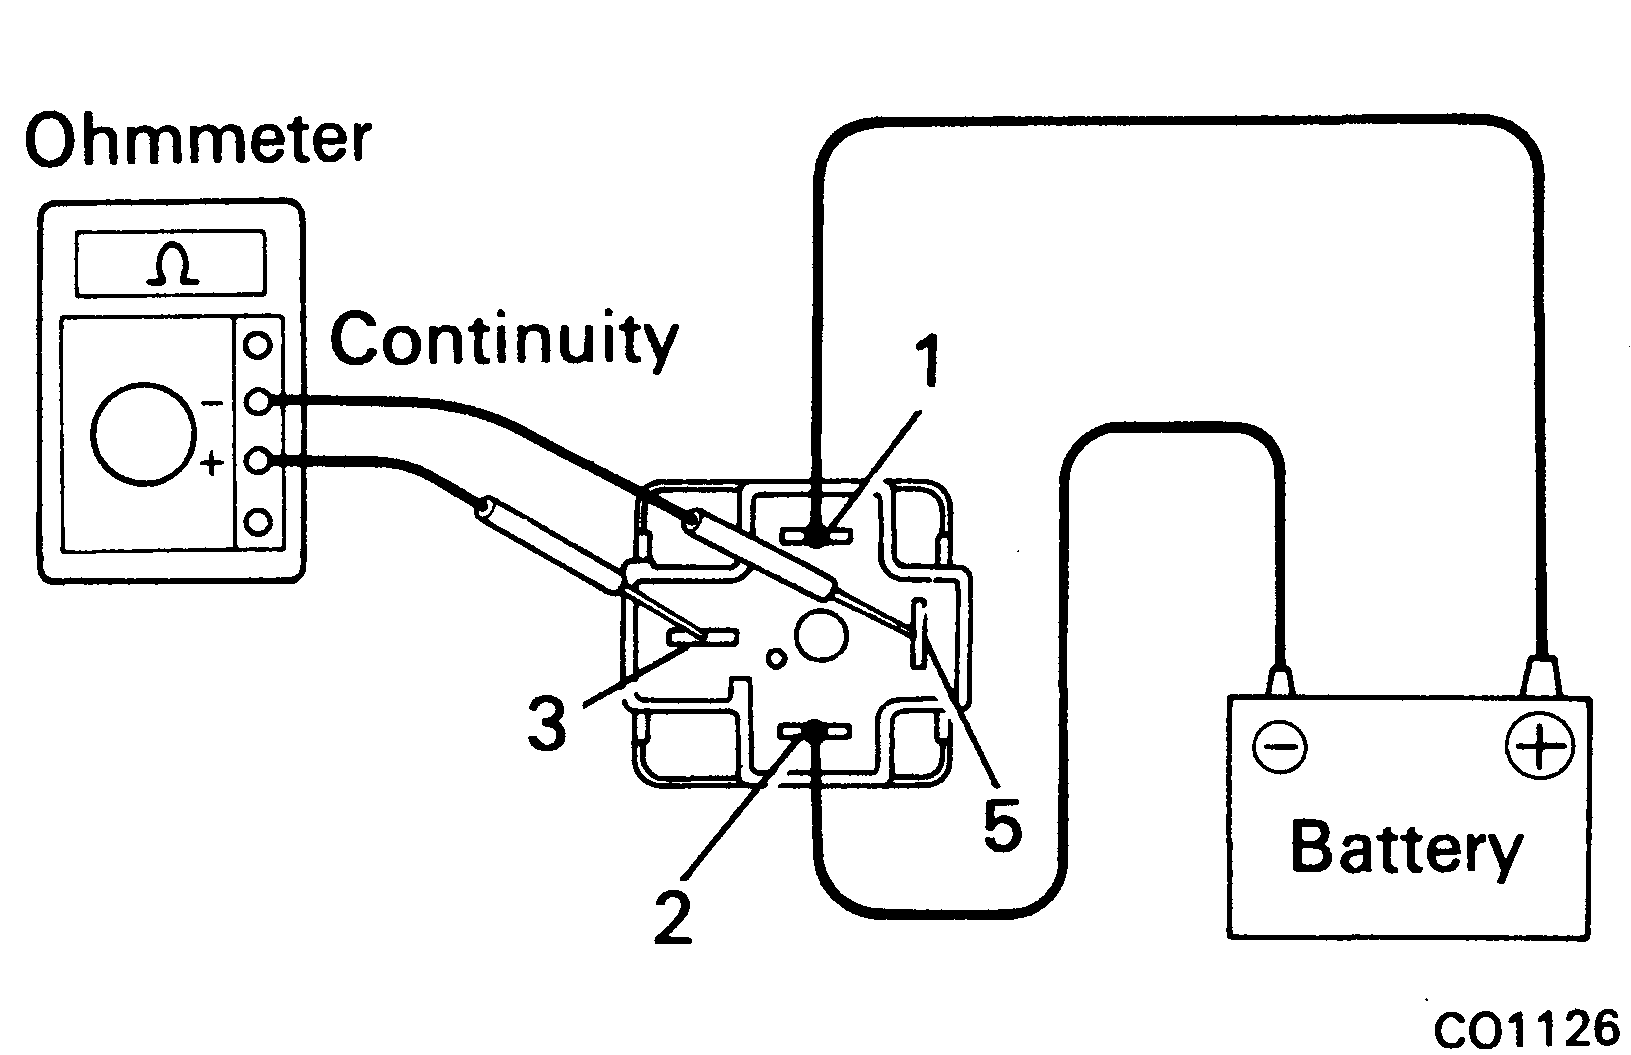
B. Inspect relay operation
- Apply battery voltage across terminal 1 and 2.
- Using an ohmmeter, check that there is continuity between terminals 3 and 5.
If operation is not as specified, replace the relay.
-
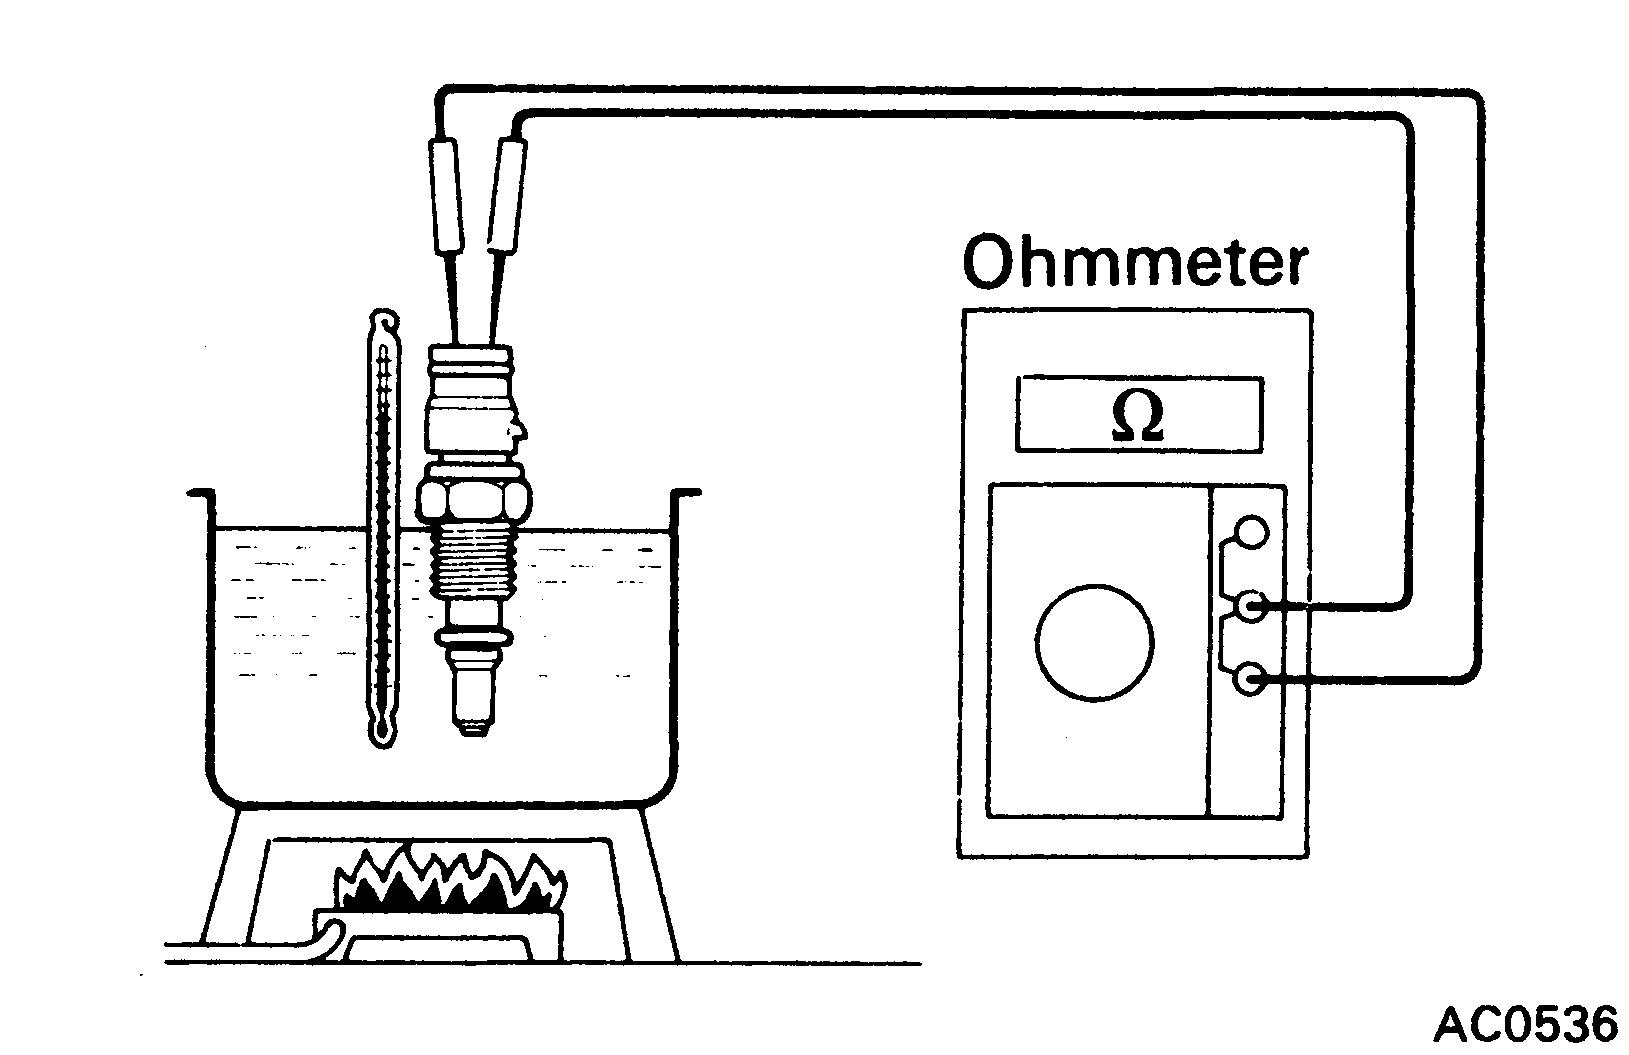
Inspect radiator water temperature sensor.
Using an ohmmeter, measure the resistance between the terminals.
Resistance:
- Approx. 1.35 kΩ at 85°C (185°F)
- Approx. 1.19 kΩ at 90°C (194°F)
- Approx. 1.05 kΩ at 95°C (203°F)
If resistance is not as specified, replace the sensor.
-
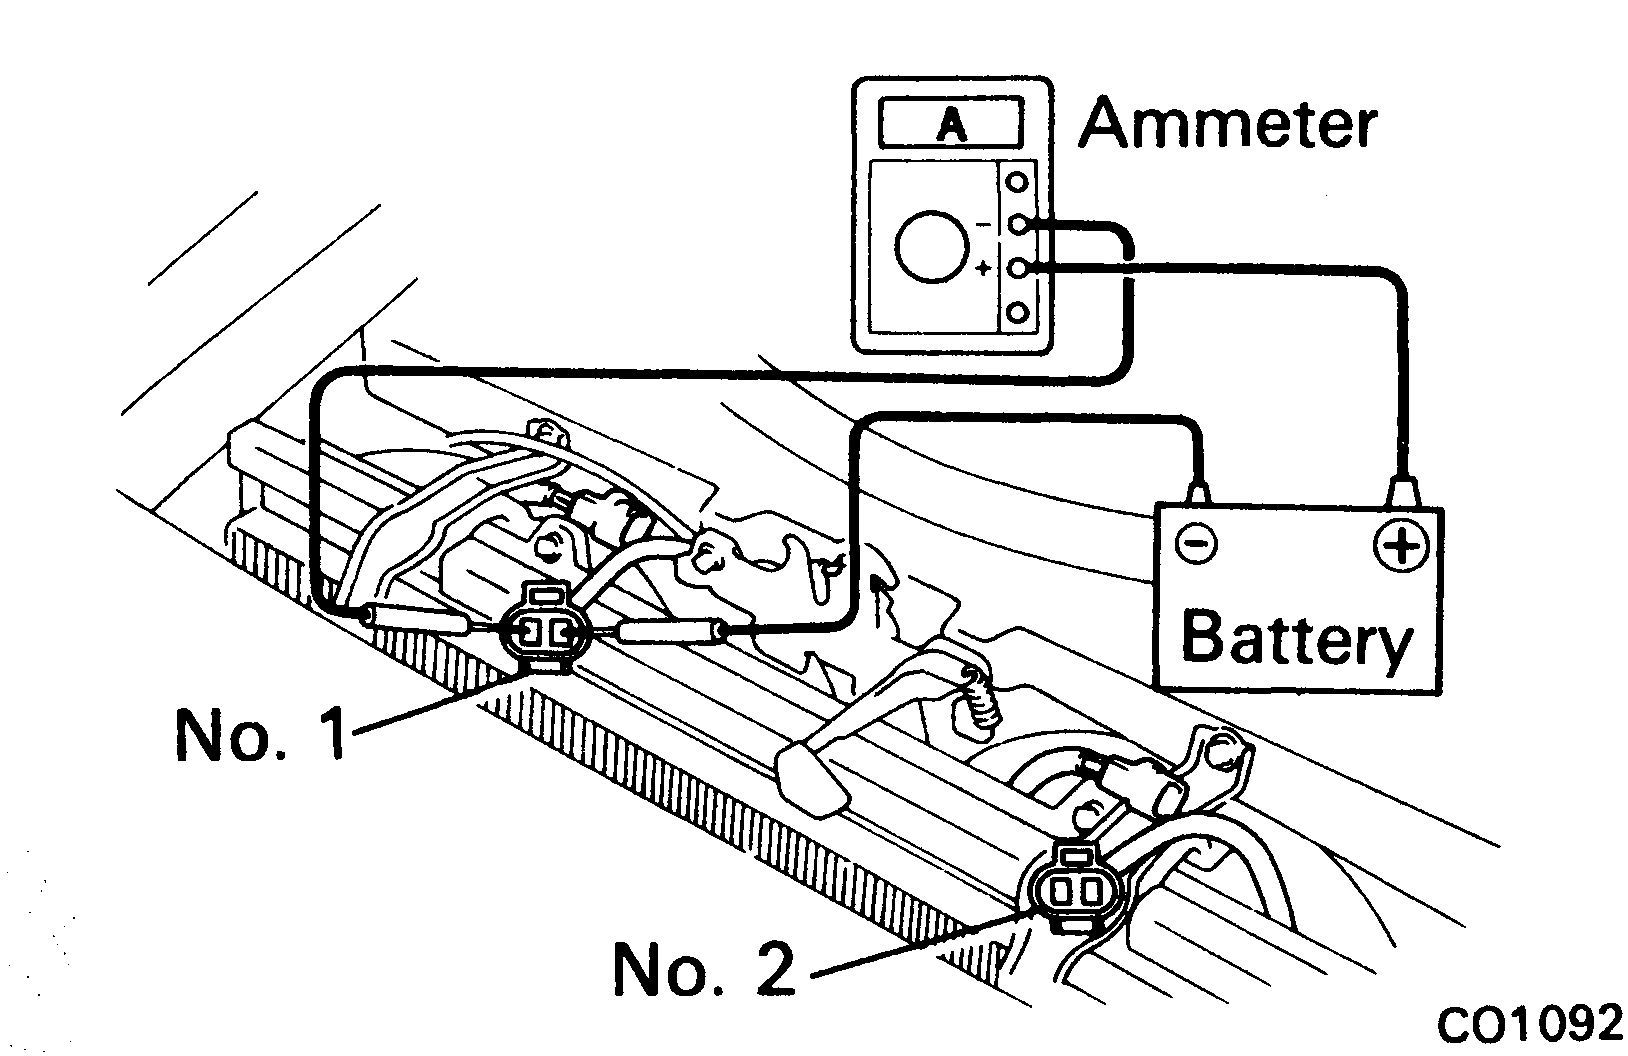
Inspect No.1 and No.2 radiator cooling fans.
- Connect battery and ammeter to the cooling fan connector.
- Check that the cooling fan rotates smoothly, and check the reading on the ammeter.
Standard amperage:
- M/T – 5.8 – 7.4 A
- A/T – 8.8 – 10.8 A
Removal of radiator cooling fans

-
Disconnect cable from negative terminal of battery.
Caution
Work must be started after approx. 20 seconds or longer from the time the ignition switch is turned to the "LOCK" position and the negative (
–) terminal cable is disconnected from the battery. -
Disconnect front luggage under covers.
- Disconnect upper radiator support seal. (See Radiator › Removal of radiator, step 4)
- Disconnect radiator cooling fan connectors.
-
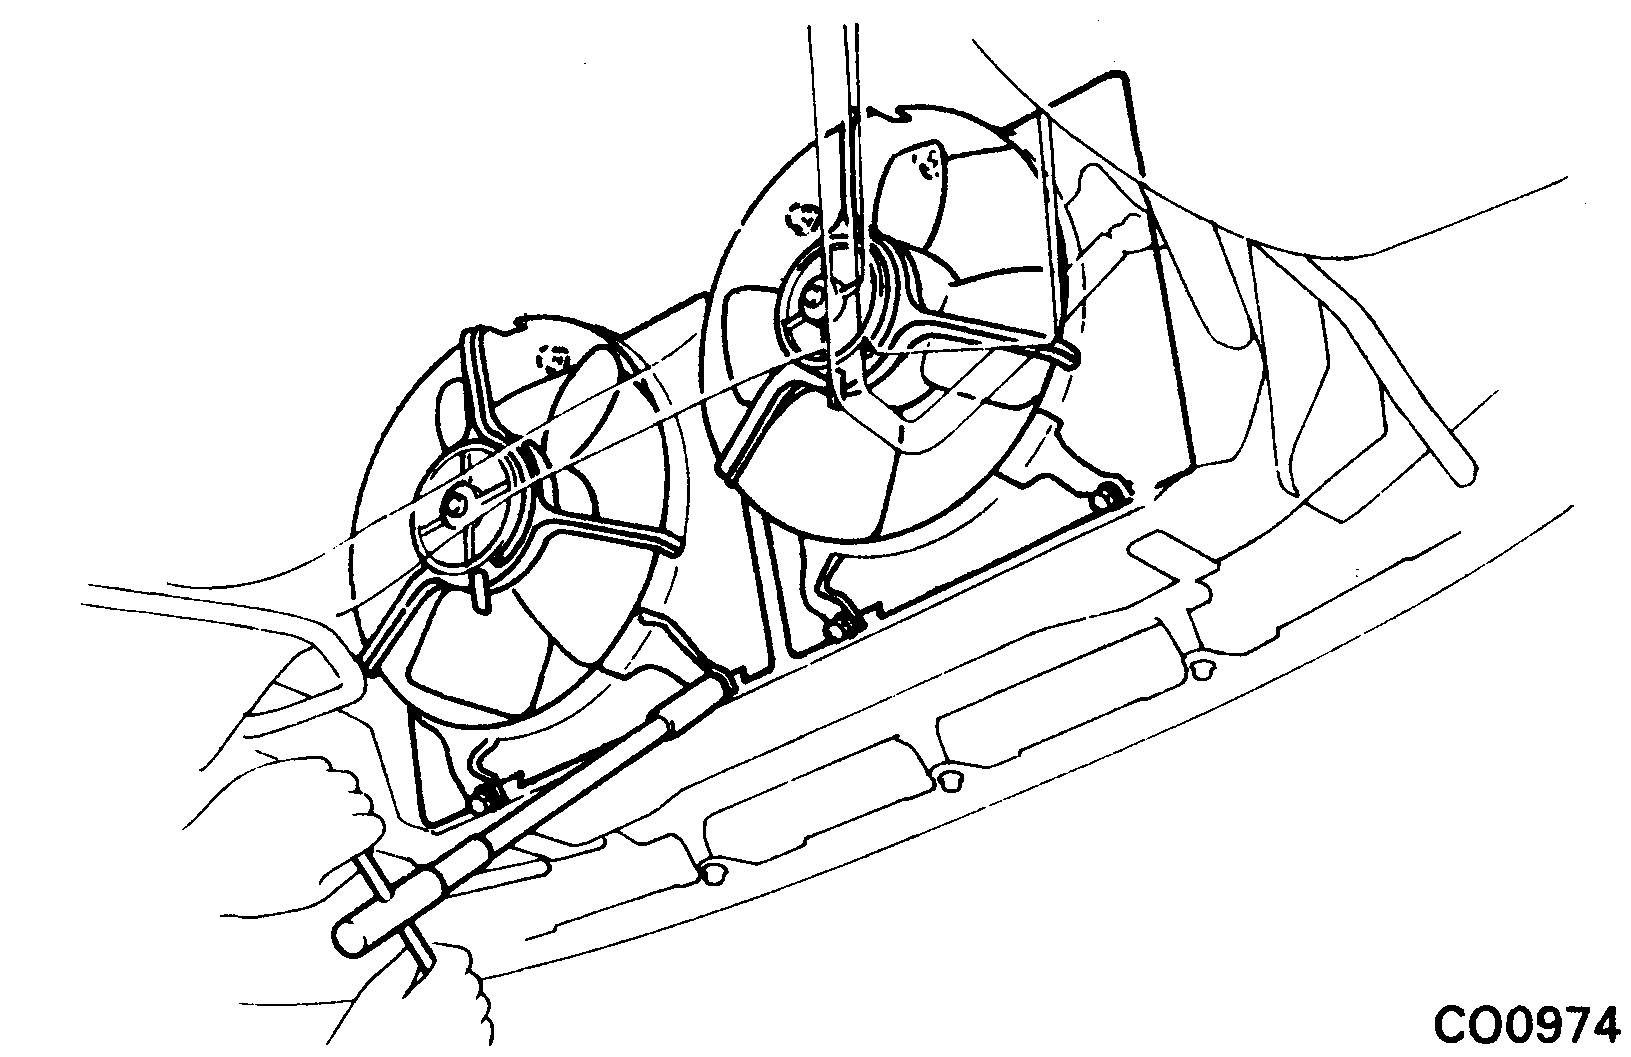
Remove radiator cooling fans.
Remove the three bolts and cooling fan. Remove the two cooling fans.
Components

Disassembly of radiator cooling fans
-
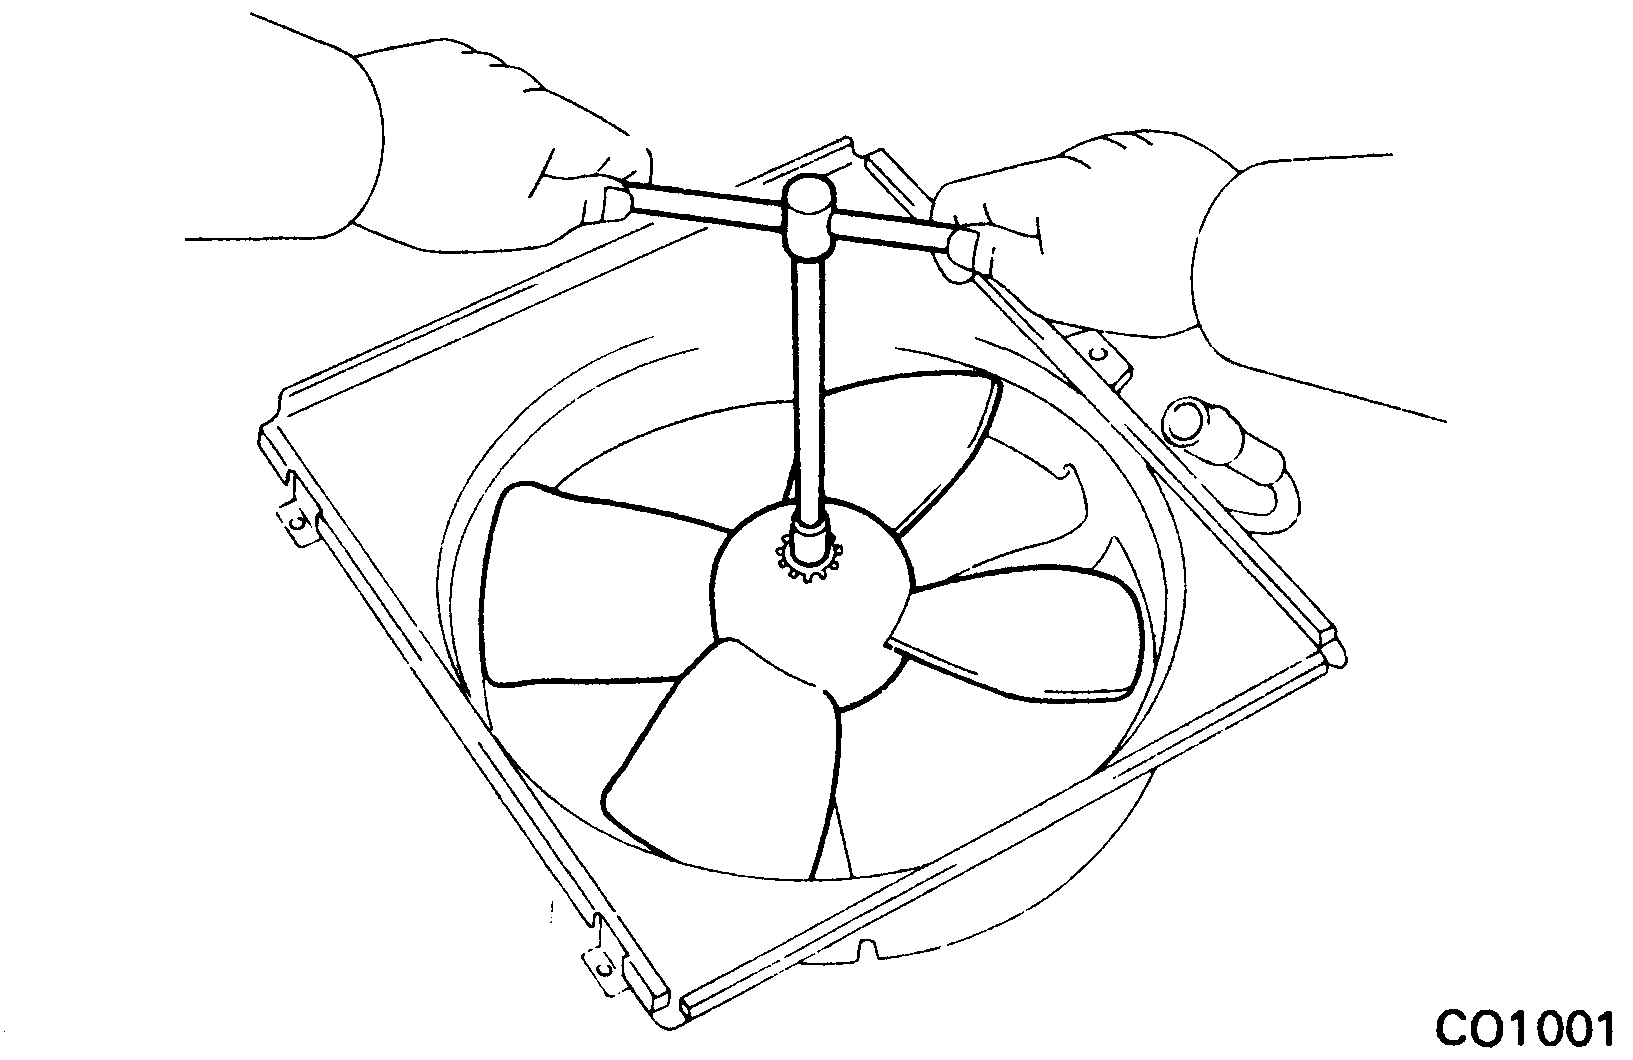
Remove fan.
Remove the nut and fan.
-
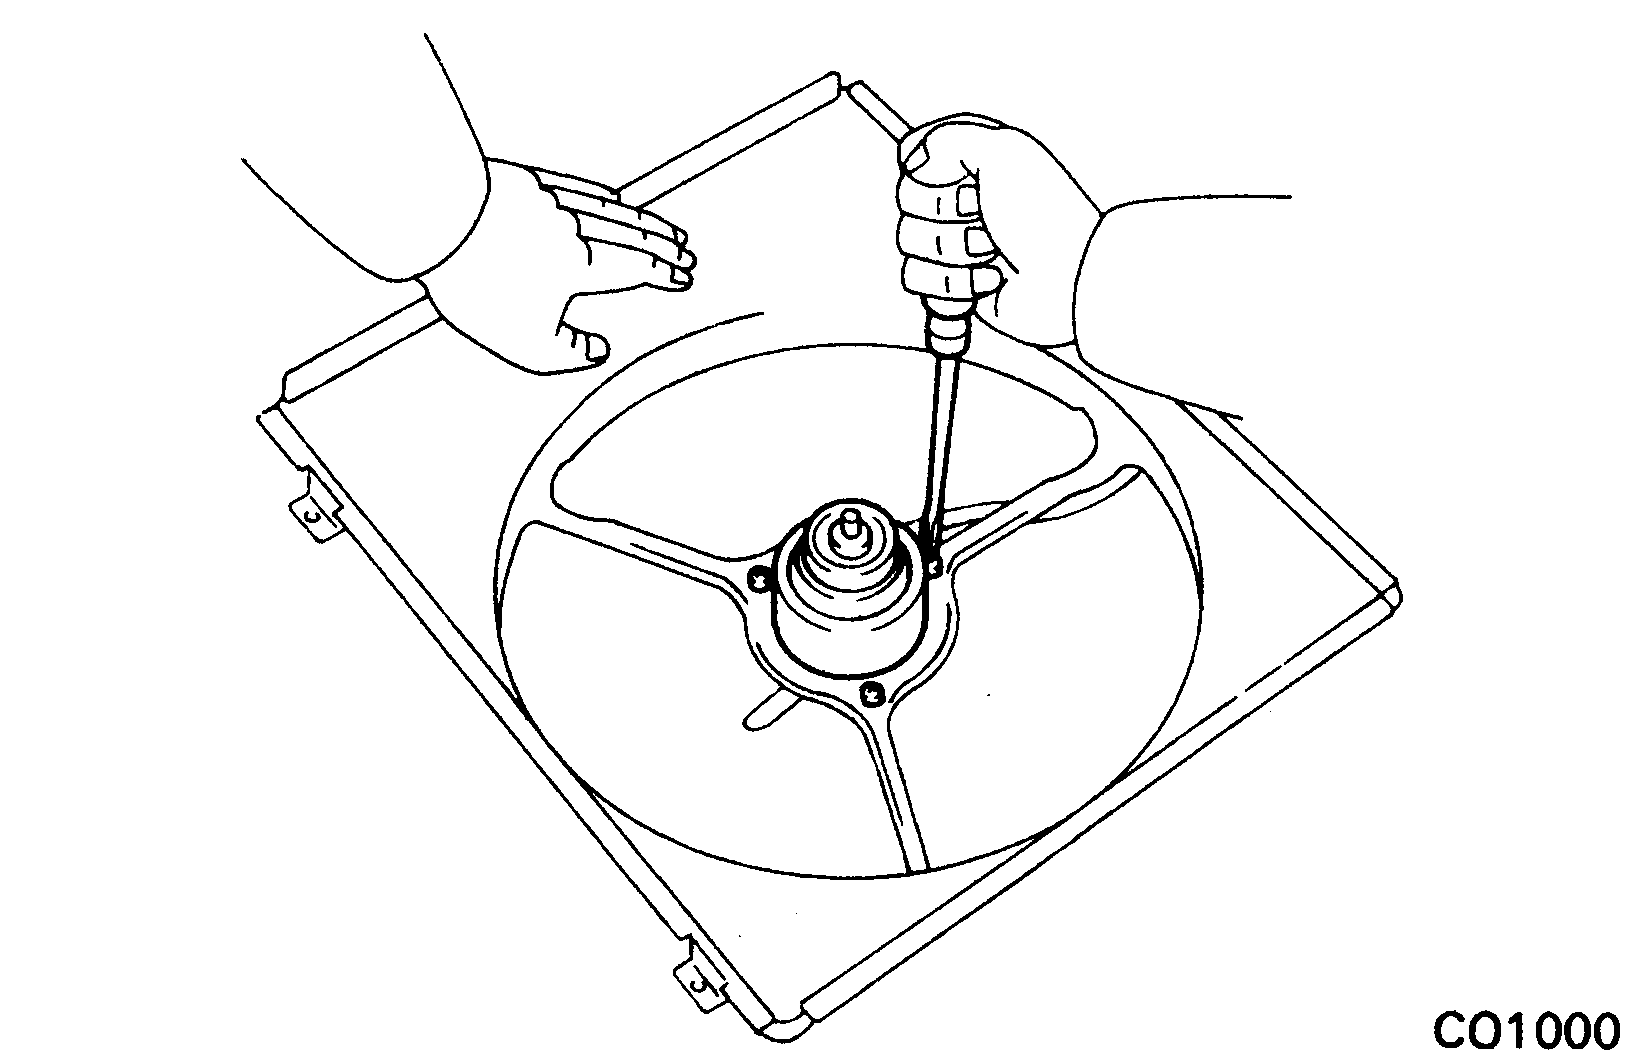
Remove fan motor.
Remove the three screws and fan motor.
Assembly of radiator cooling fans
- Install fan motor.
- Install fan.
Installation of radiator cooling fans
(See Removal of radiator cooling fans)
-
Install radiator cooling fans.
Install the cooling fan with the three bolts. Install the two cooling fans.
-
Connect radiator cooling fan connectors.
- Connect upper radiator support seal. (See Radiator › Installation of radiator, step 10)
- Connect front luggage under covers.
- Connect cable to negative terminal of battery.